E-PL3 full spectrum conversion
The other day I bought what is effectively a free Olympus E-PL3 --- a package of the E-PL3, the kit 14-42mm and the 40-150mm lenses for just $160. Considering I already have both of those lenses and their price on the second hand market, this left me in the black on the entire purchase.
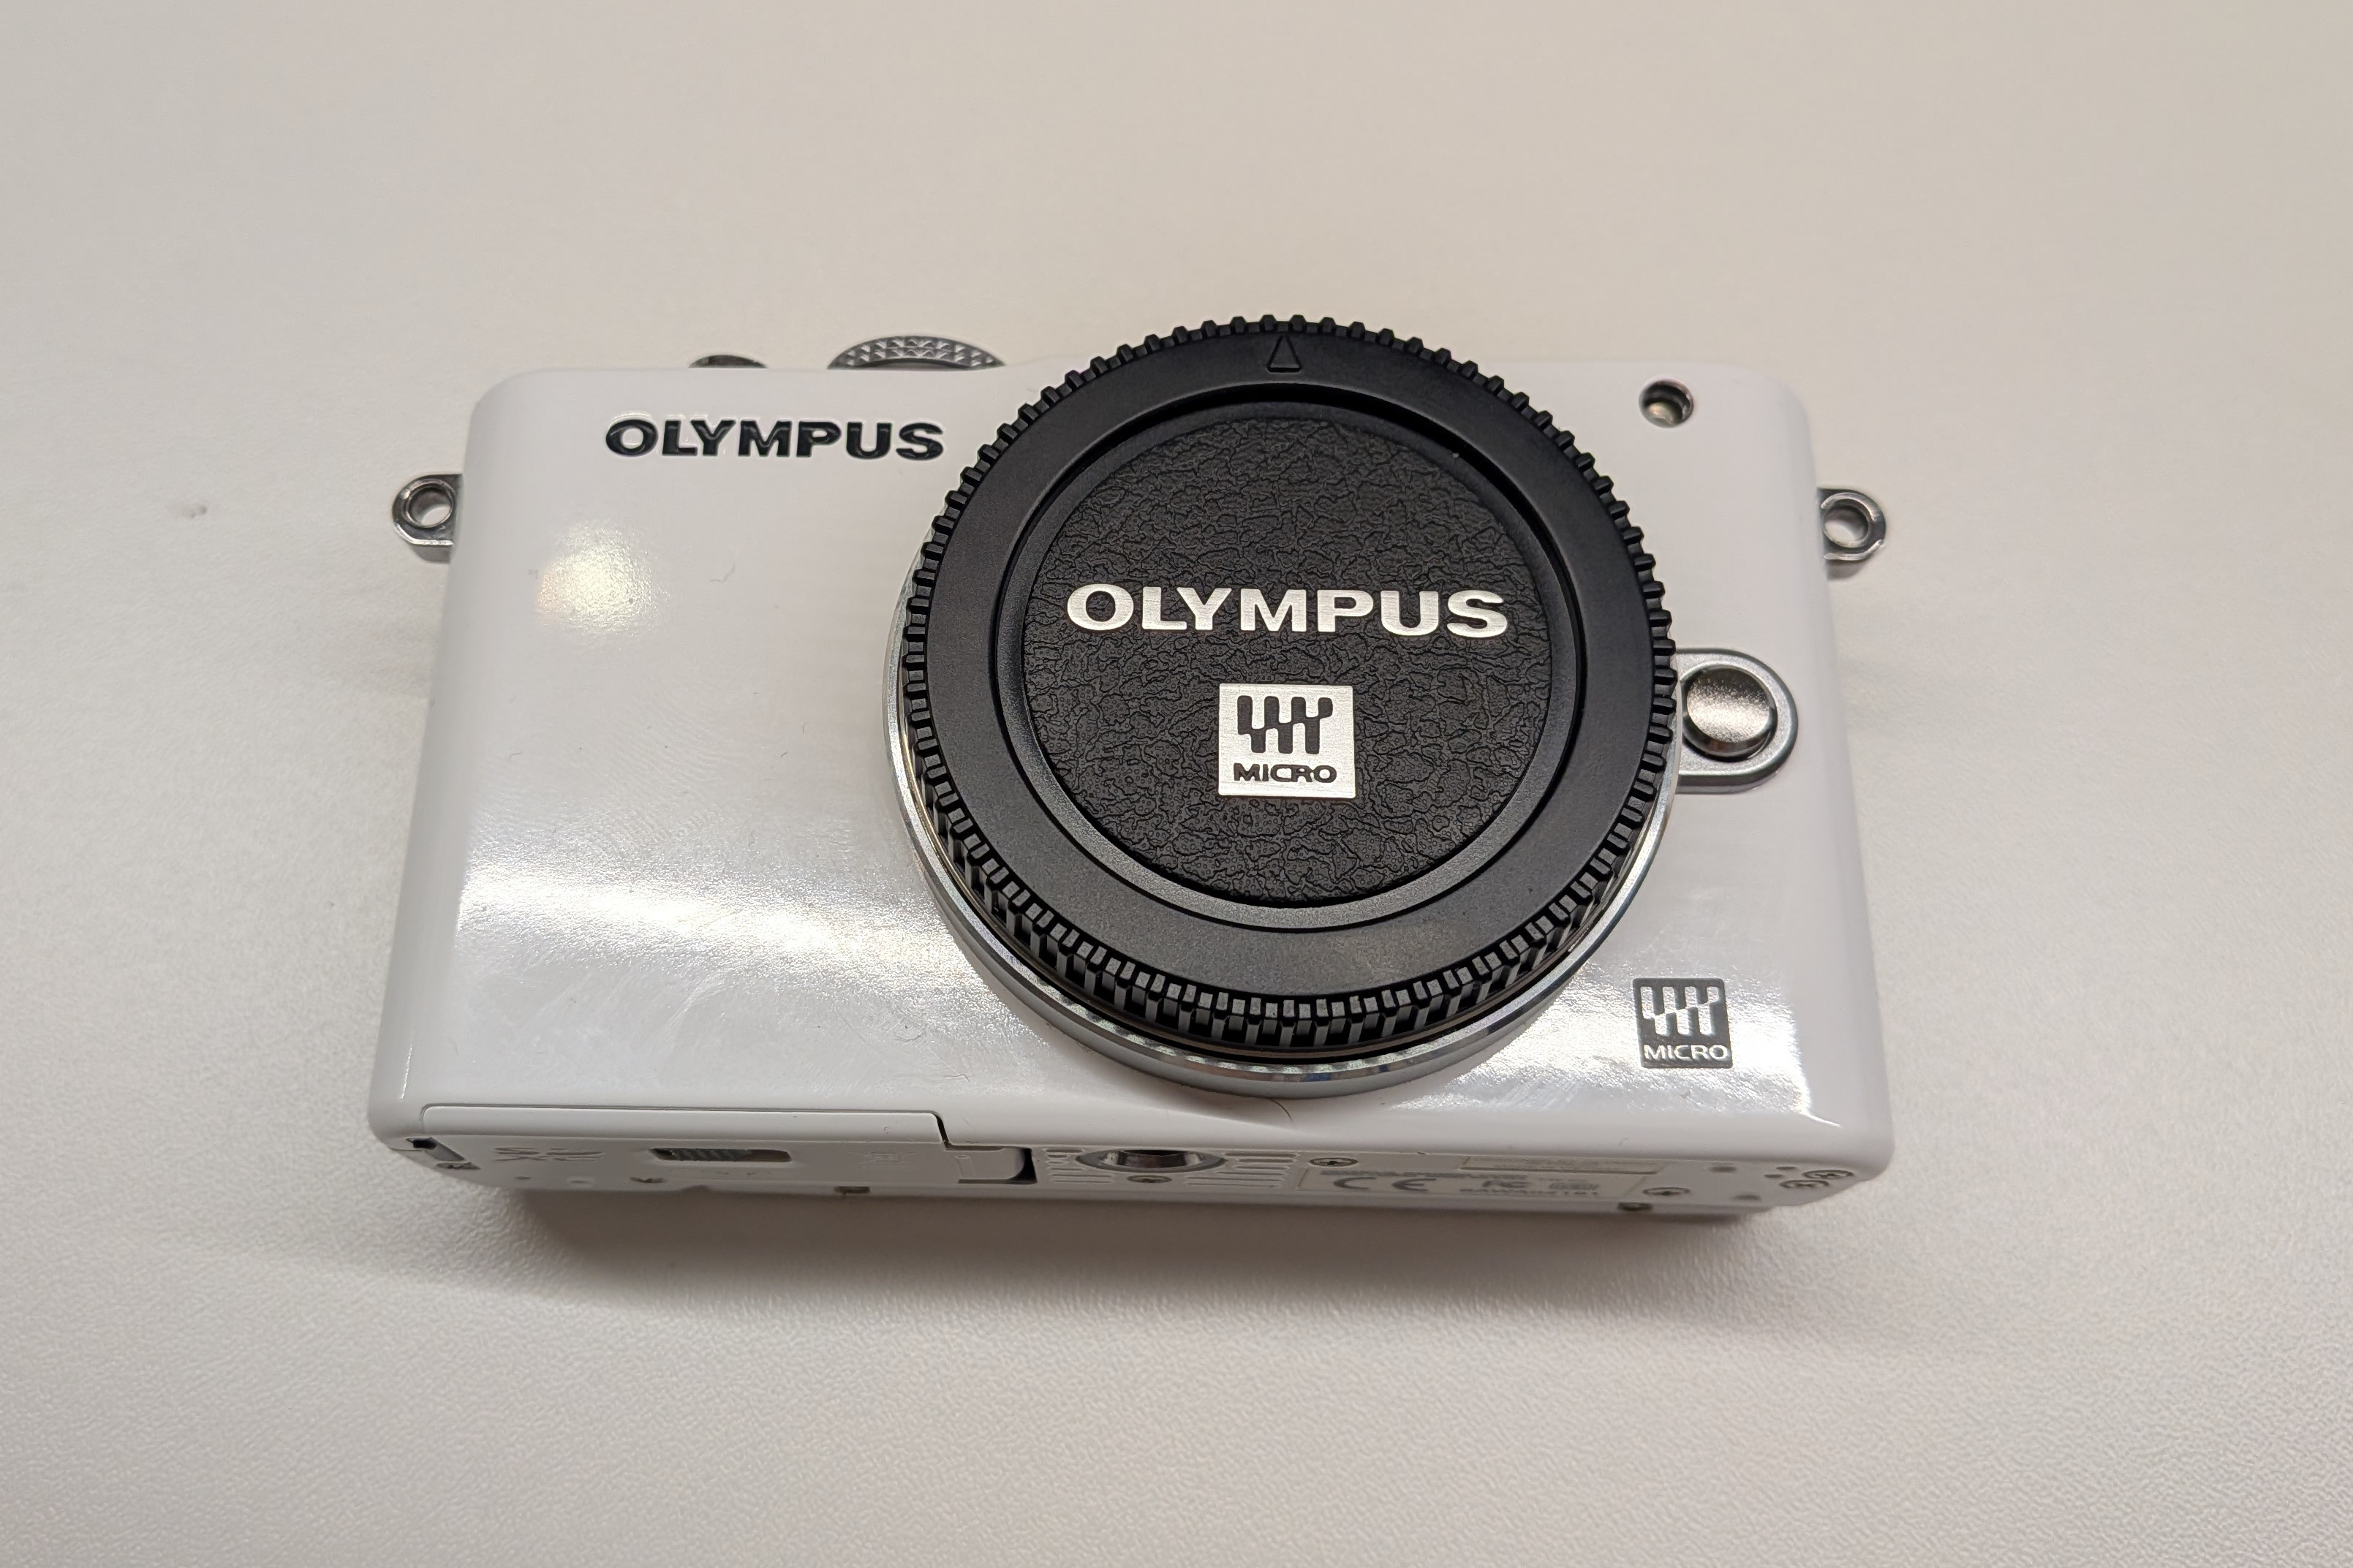
Although I am sure there are people that would enjoy using the E-PL3 as a regular camera, it is realistically pretty antiquated. It however still is a modern mirrorless camera with a Micro Four Thirds sensor, meaning some image quality can be expected.
I bought it specifically for a full spectrum conversion, so my requirements in terms of features were pretty relaxed.
The conversion#
A guide for the E-PL3 conversion is not really available on the web. Luckily, the E-PL3 is mechanically very similar to the newer E-PL5 and there is an excellent guide for it on the LifePixel site. I found these differences, not counting cases where the screws are slightly different but still logically related:
- In Step 1, it is also necessary to unscrew a black screw on the bottom of the battery compartment.
- In Step 11, there is no need to desolder anything. Meaning no soldering is required for the whole conversion, if that matters to anyone.
- In Step 12, there is a total of three screws to remove, not just one. One of the extra screws is located next to the left attachment point for the strap, and the other is located nearby, very deeply inside the body of the camera. A long screwdriver is needed to reach it, standard precision screwdriver bits are not long enough.
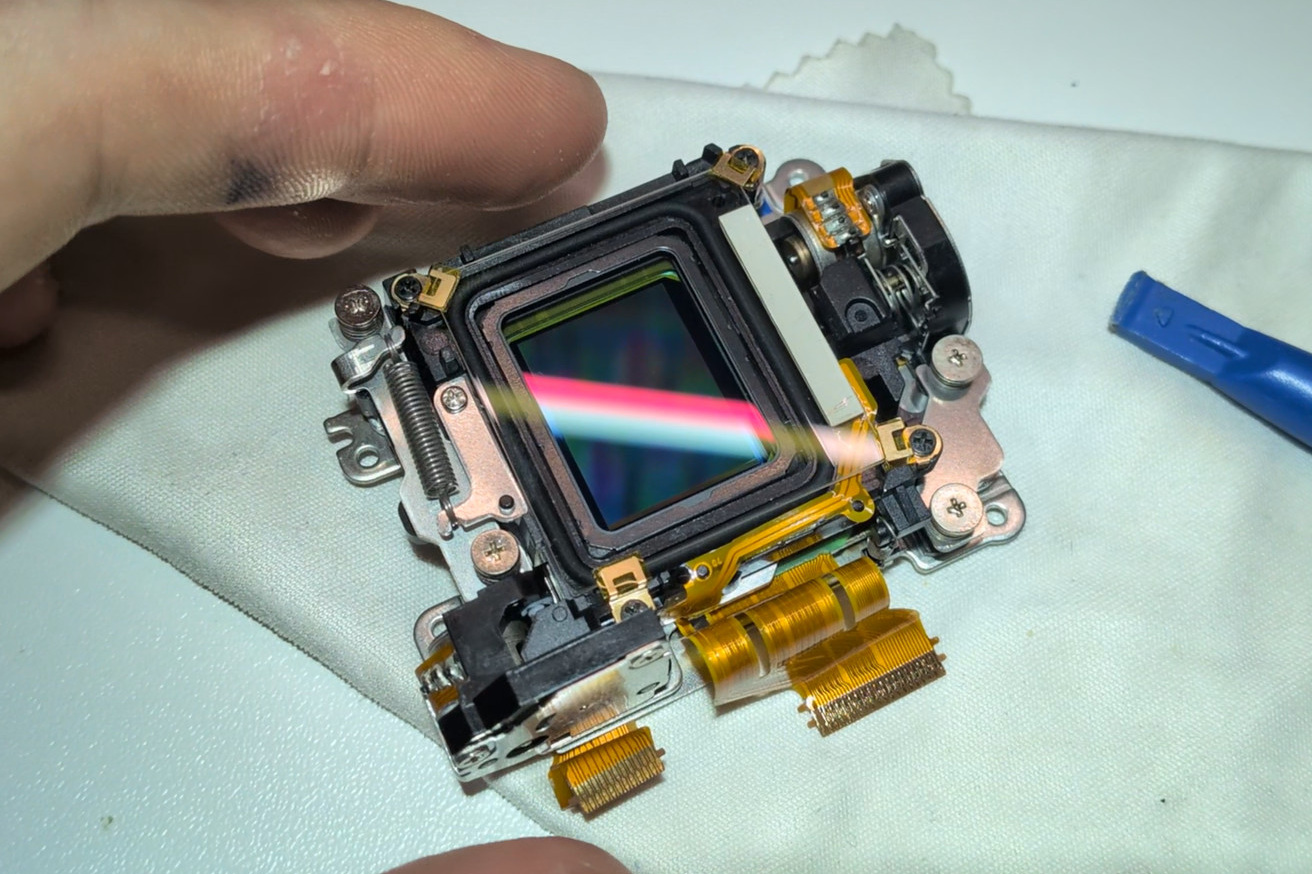
- In Step 14, there are metal washers underneath the screws of the IBIS cage. Be careful to not lose them into the shutter assembly. I left them out when reassembling as it is hard to place them correctly, but they likely tune the sensor plane pitch and yaw, so it is probably better to put them back. Beware that they come in different thicknesses!
- In Step 16, I do not know how to cleanly disconnect the dust reduction filter. I just snipped the flex cable as I did not plan to keep it in my camera anyway (it is usually not very transparent in UV).
- In Step 17, removing the filter retaining clip is challenging. It is bent in a certain shape under the frame and pulling it out requires effectively unbending it. However, the main challenge comes at reassembly. I was not able to put it back in a satisfactory shape, but it sure is in there somehow. This is not really a difference, but I wanted to point out that this step is not trivial.
After reassembling the camera and powering it on, the shutter clicked, the sensor shifted and the LCD display blinked on. Then the camera instantly turned off, with no indication of what went wrong. The shutter stayed closed after this process. I disassembled the camera again up to the IBIS cage, reassembled it more carefully and then it worked. I have only theories as to what could have been the cause of the problem.
I also tried fixing the broken IBIS by realigning the gears, but even though everything seems to be running smoothly, the camera still reports that the IBIS is not functional. A few stops of stabilization would be nice to have, but beggars can't be choosers. The IBIS on the E-PL3 is not known to be very effective anyway.
The clear glass I used was from this AliExpress listing, picking the "EP3" variant as that camera model seemed reasonably close to the E-PL3. I do not know what the difference between the various micro four thirds variants available in the listing is, but the glass fits perfectly.
The results#
One of the first pictures I produced was a hot soldering iron:
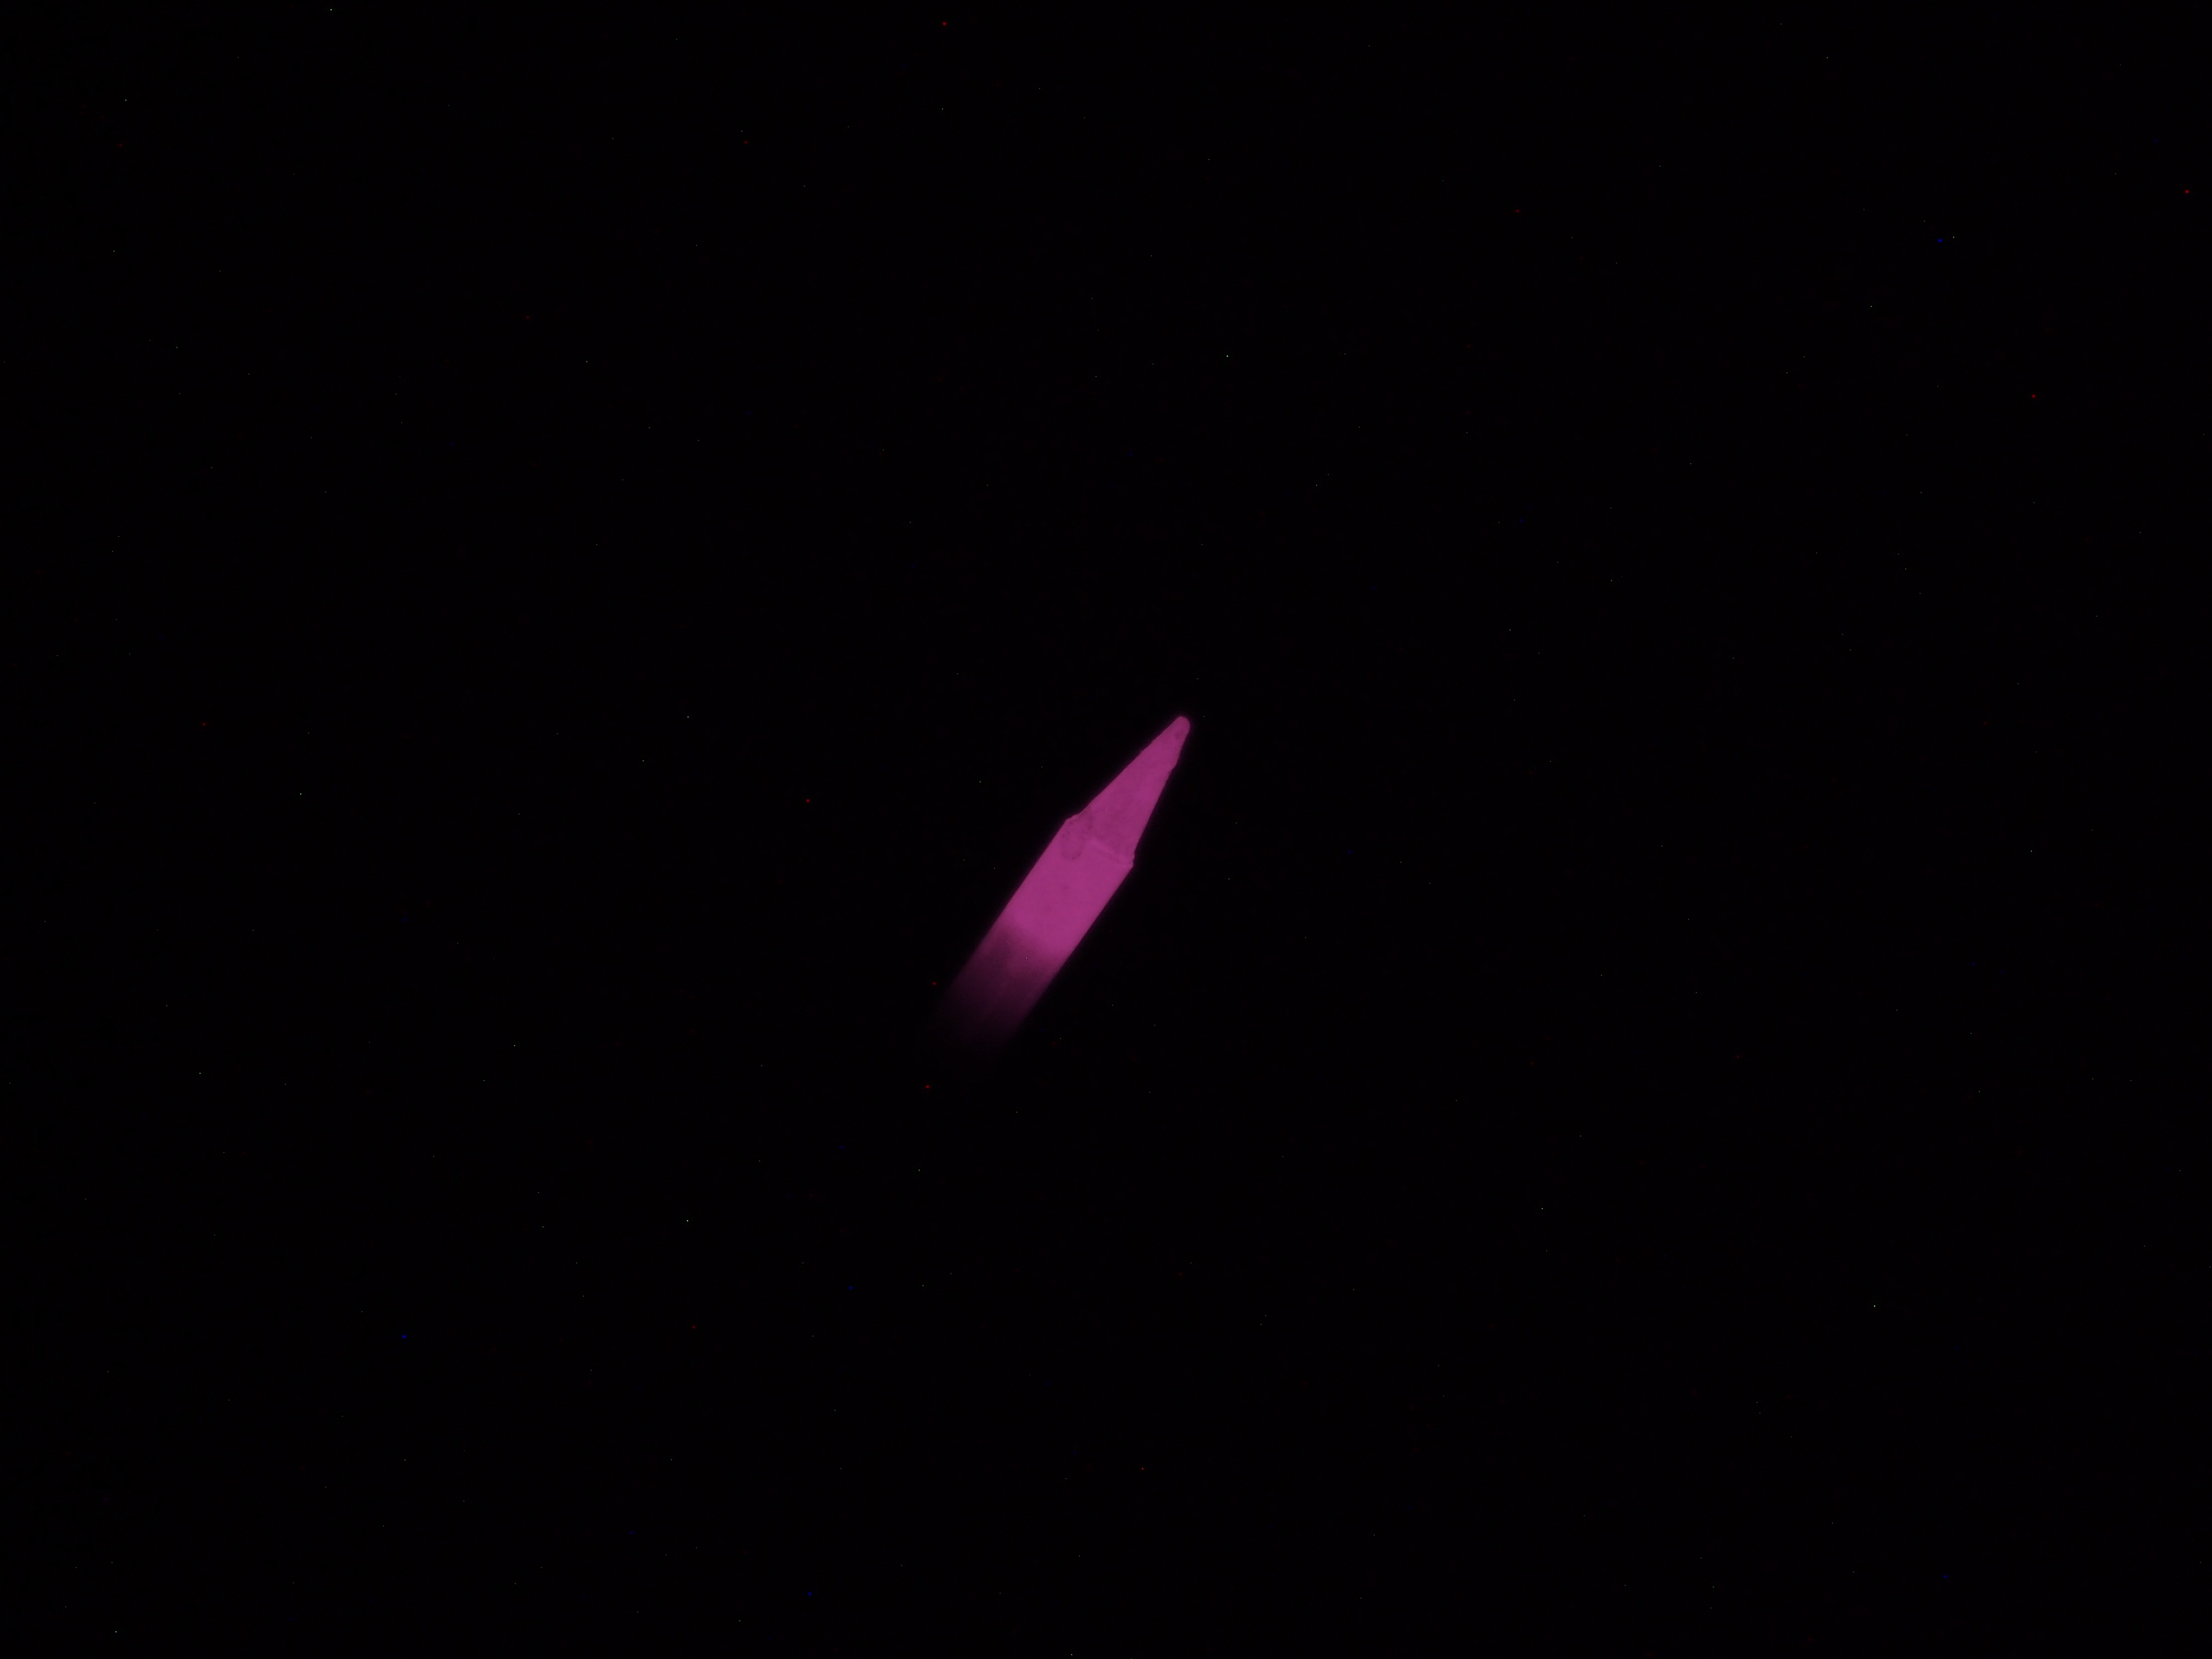
Clicking the image shows the full resolution version. It is pretty clear I was woefully underprepared for the conversion as there is quite a lot of dust on the sensor.
Unfortunately, the seller just taped the glass down with scotch tape, meaning there was quite a lot of adhesive residue on it. I cleaned it as well as I could with isopropyl alcohol, but since I discovered this after I was pretty deep in the camera disassembly, there was no practical way to get a more dust free environment for the process.
Luckily all the dust spots are just a few pixels at most, so they are removable in post processing. I am going to set up a static mask at some point to make the cleanup completely automated and reliable.
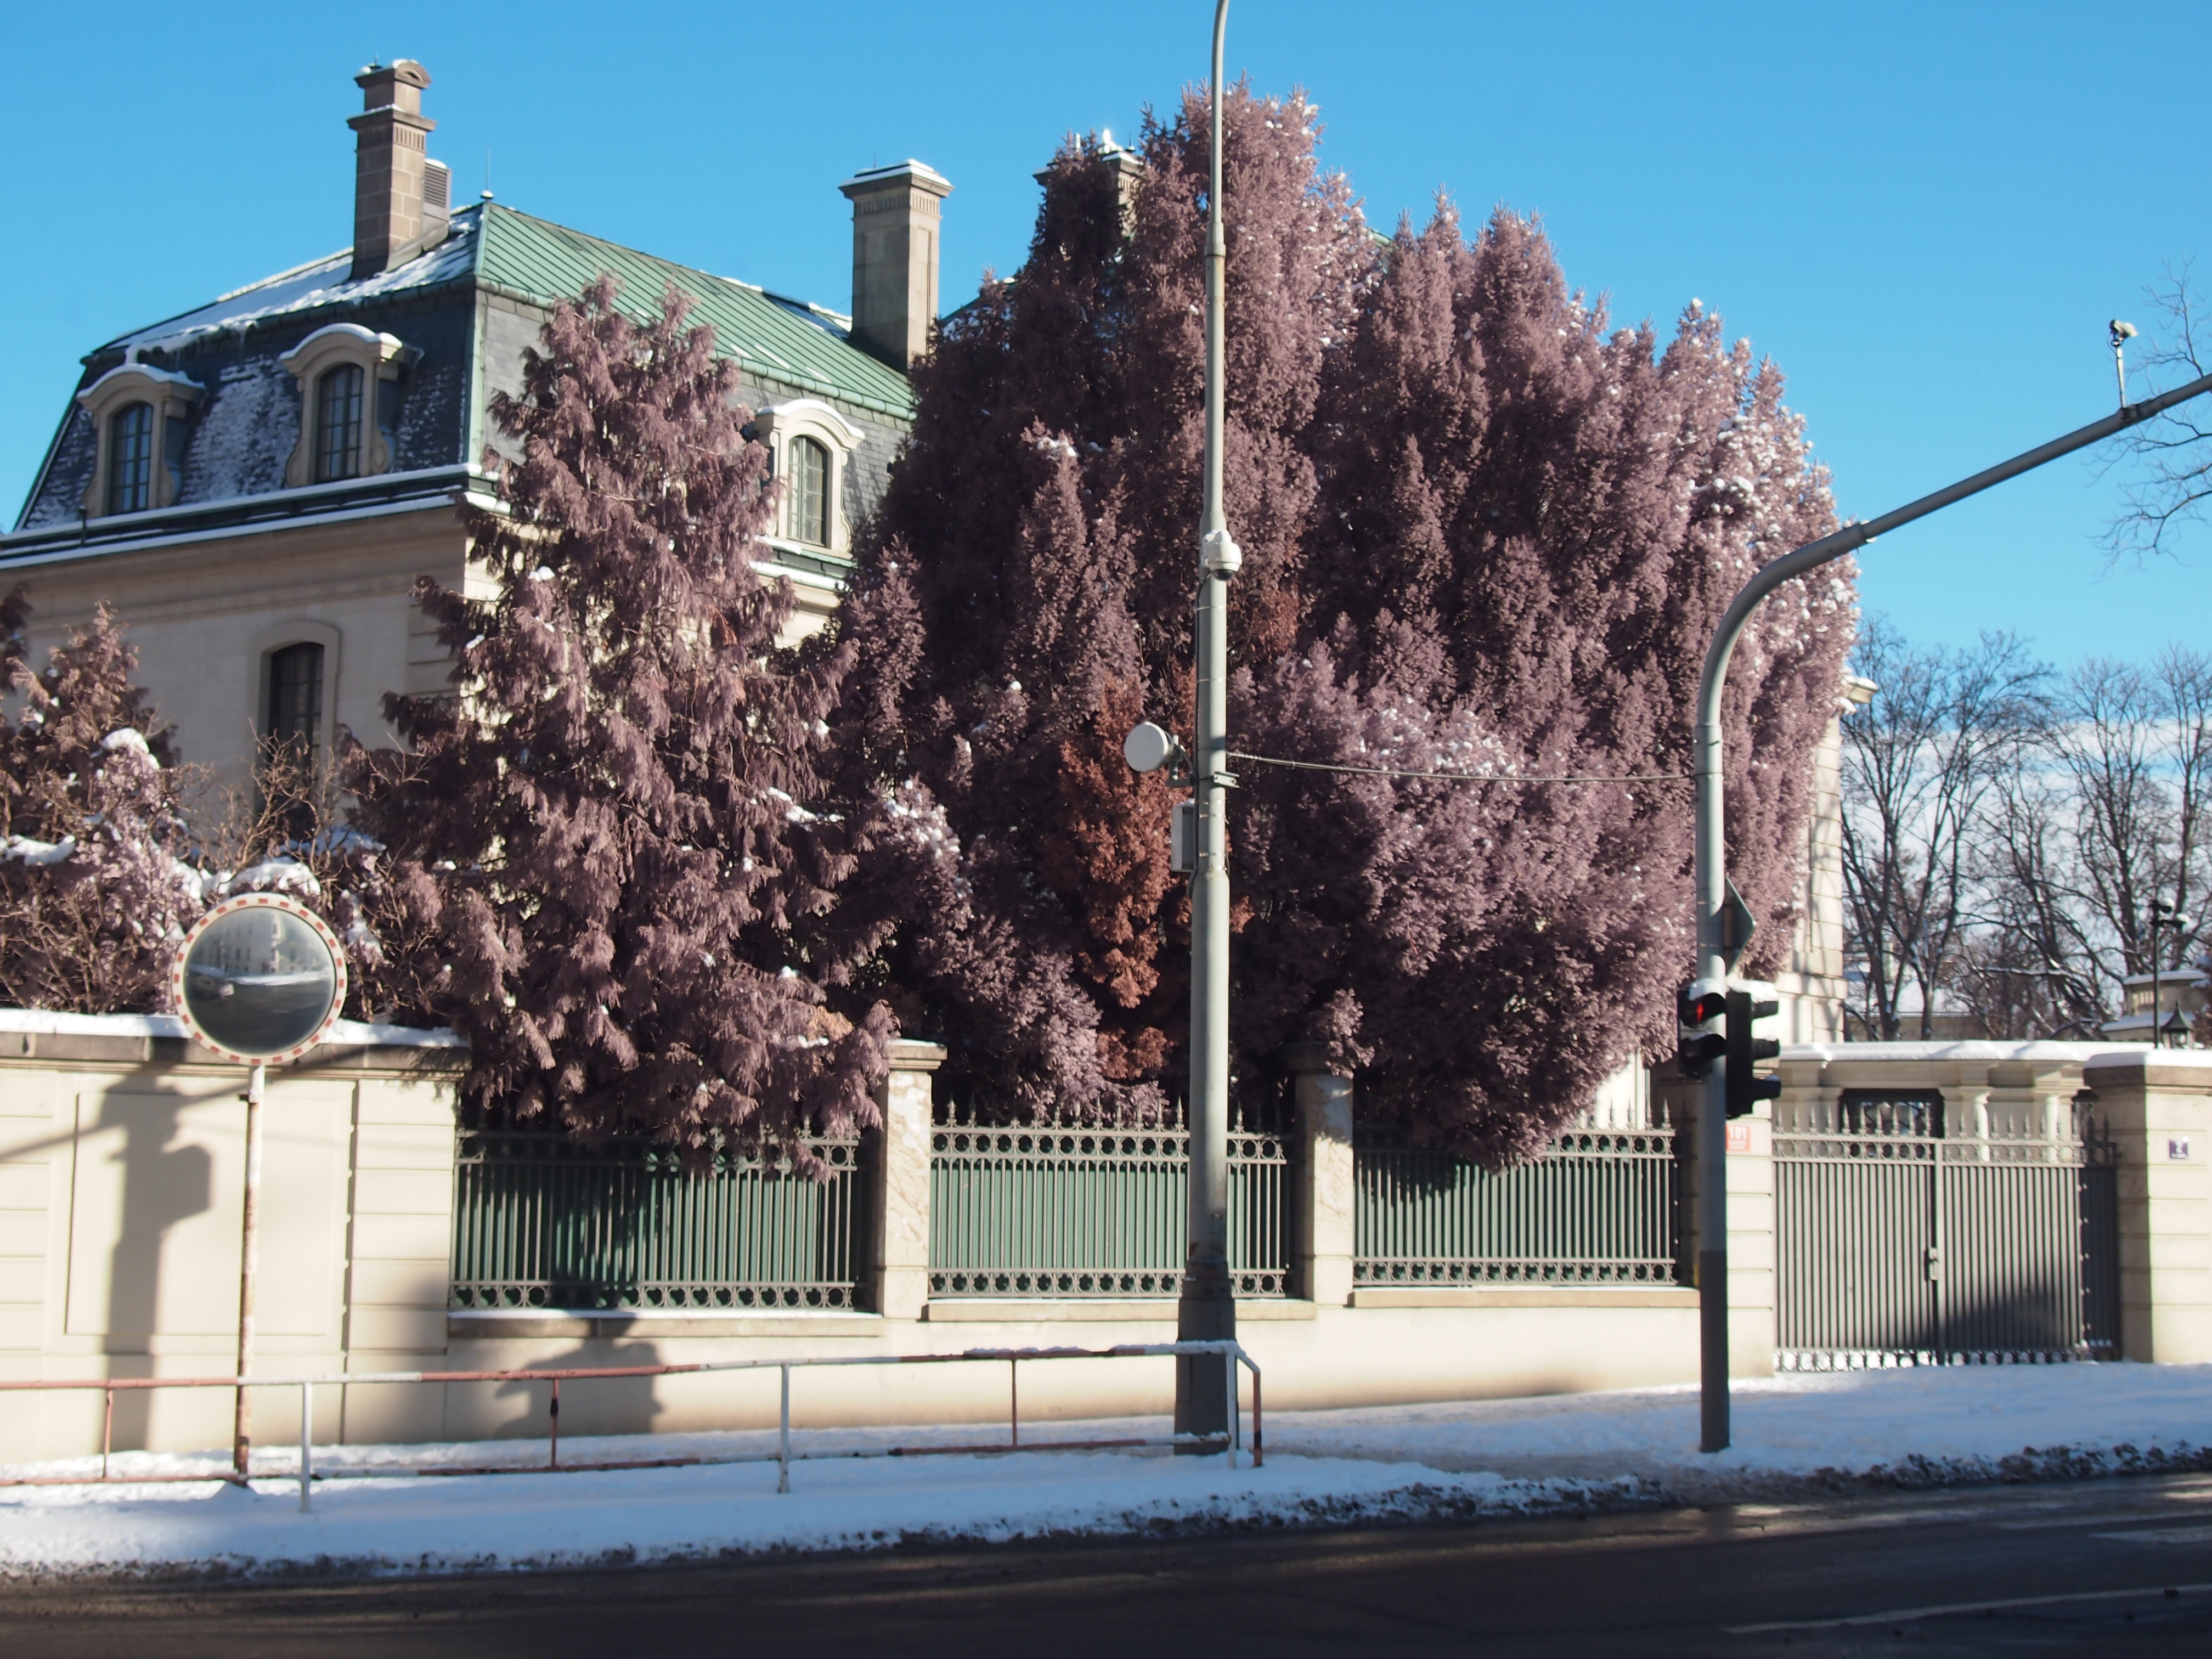
Another early picture was of a tree. This is without any filter, with white balance on the snow. The image is noticeably soft even though it is shot at f/8 and 1/400. I have yet to investigate the cause, but my current guess is chromatic aberration since the lens (the kit 14-42mm) is certainly not corrected for full spectrum use.
With this 580nm IR pass filter, I can get reasonably nice false color IR images:
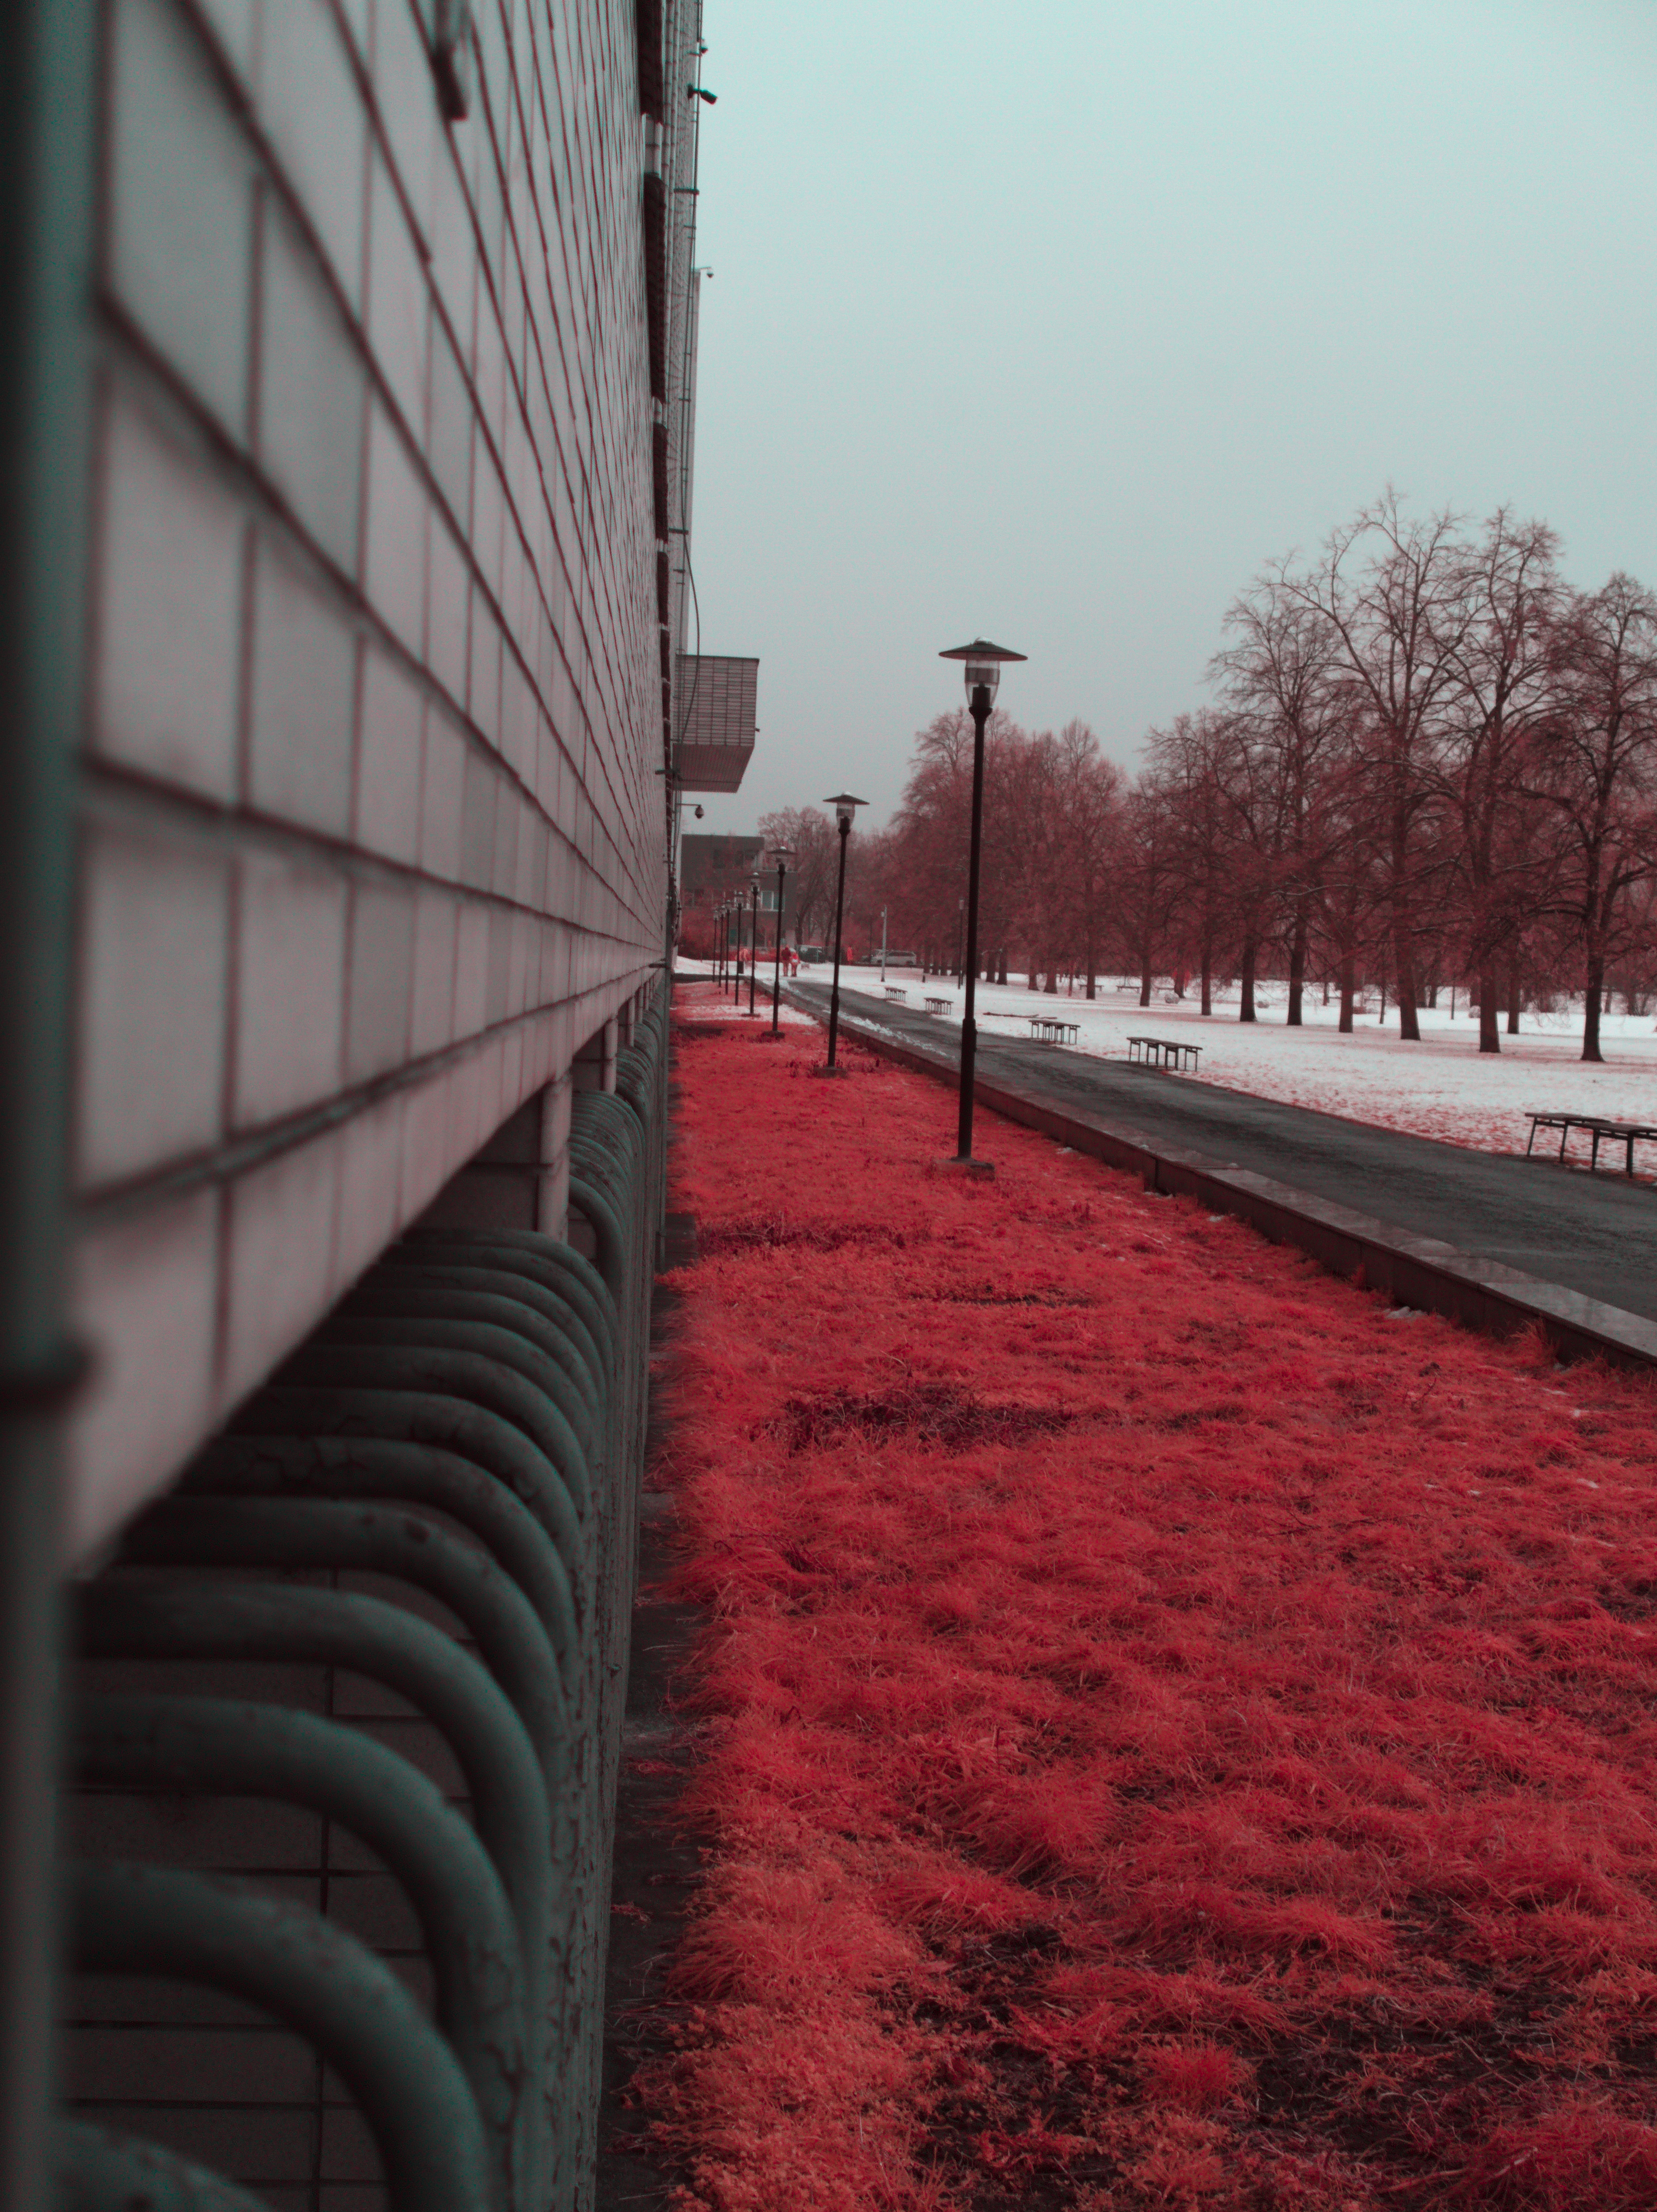
It is worth noting that postprocessing of these images is quite nontrivial. In reality, the foliage is going to be more blue than the rest of the image. This is because the red channel captures a lot of unfiltered red light, while the blue channel accepts blue (which is filtered by the 580nm filter) and IR (since the Bayer mask pigments do pass IR reasonably well). This is why swapping the red and blue is usually done to get the characteristic "blue/white sky, red foliage" look of false color IR images.
This can be mitigated by using a "soft hot mirror + gel filter" stack-up, such as described here. The picture below is straight out of the camera JPEG, with a GRB3 as the hot mirror and a Lee Filters 354 Special Steel Blue*I tried like 5 different blue-ish gel filters and the results are very similar. as the gel filter. I had to manually white balance on a white card before shooting, the camera's AWB is unusable with this setup.
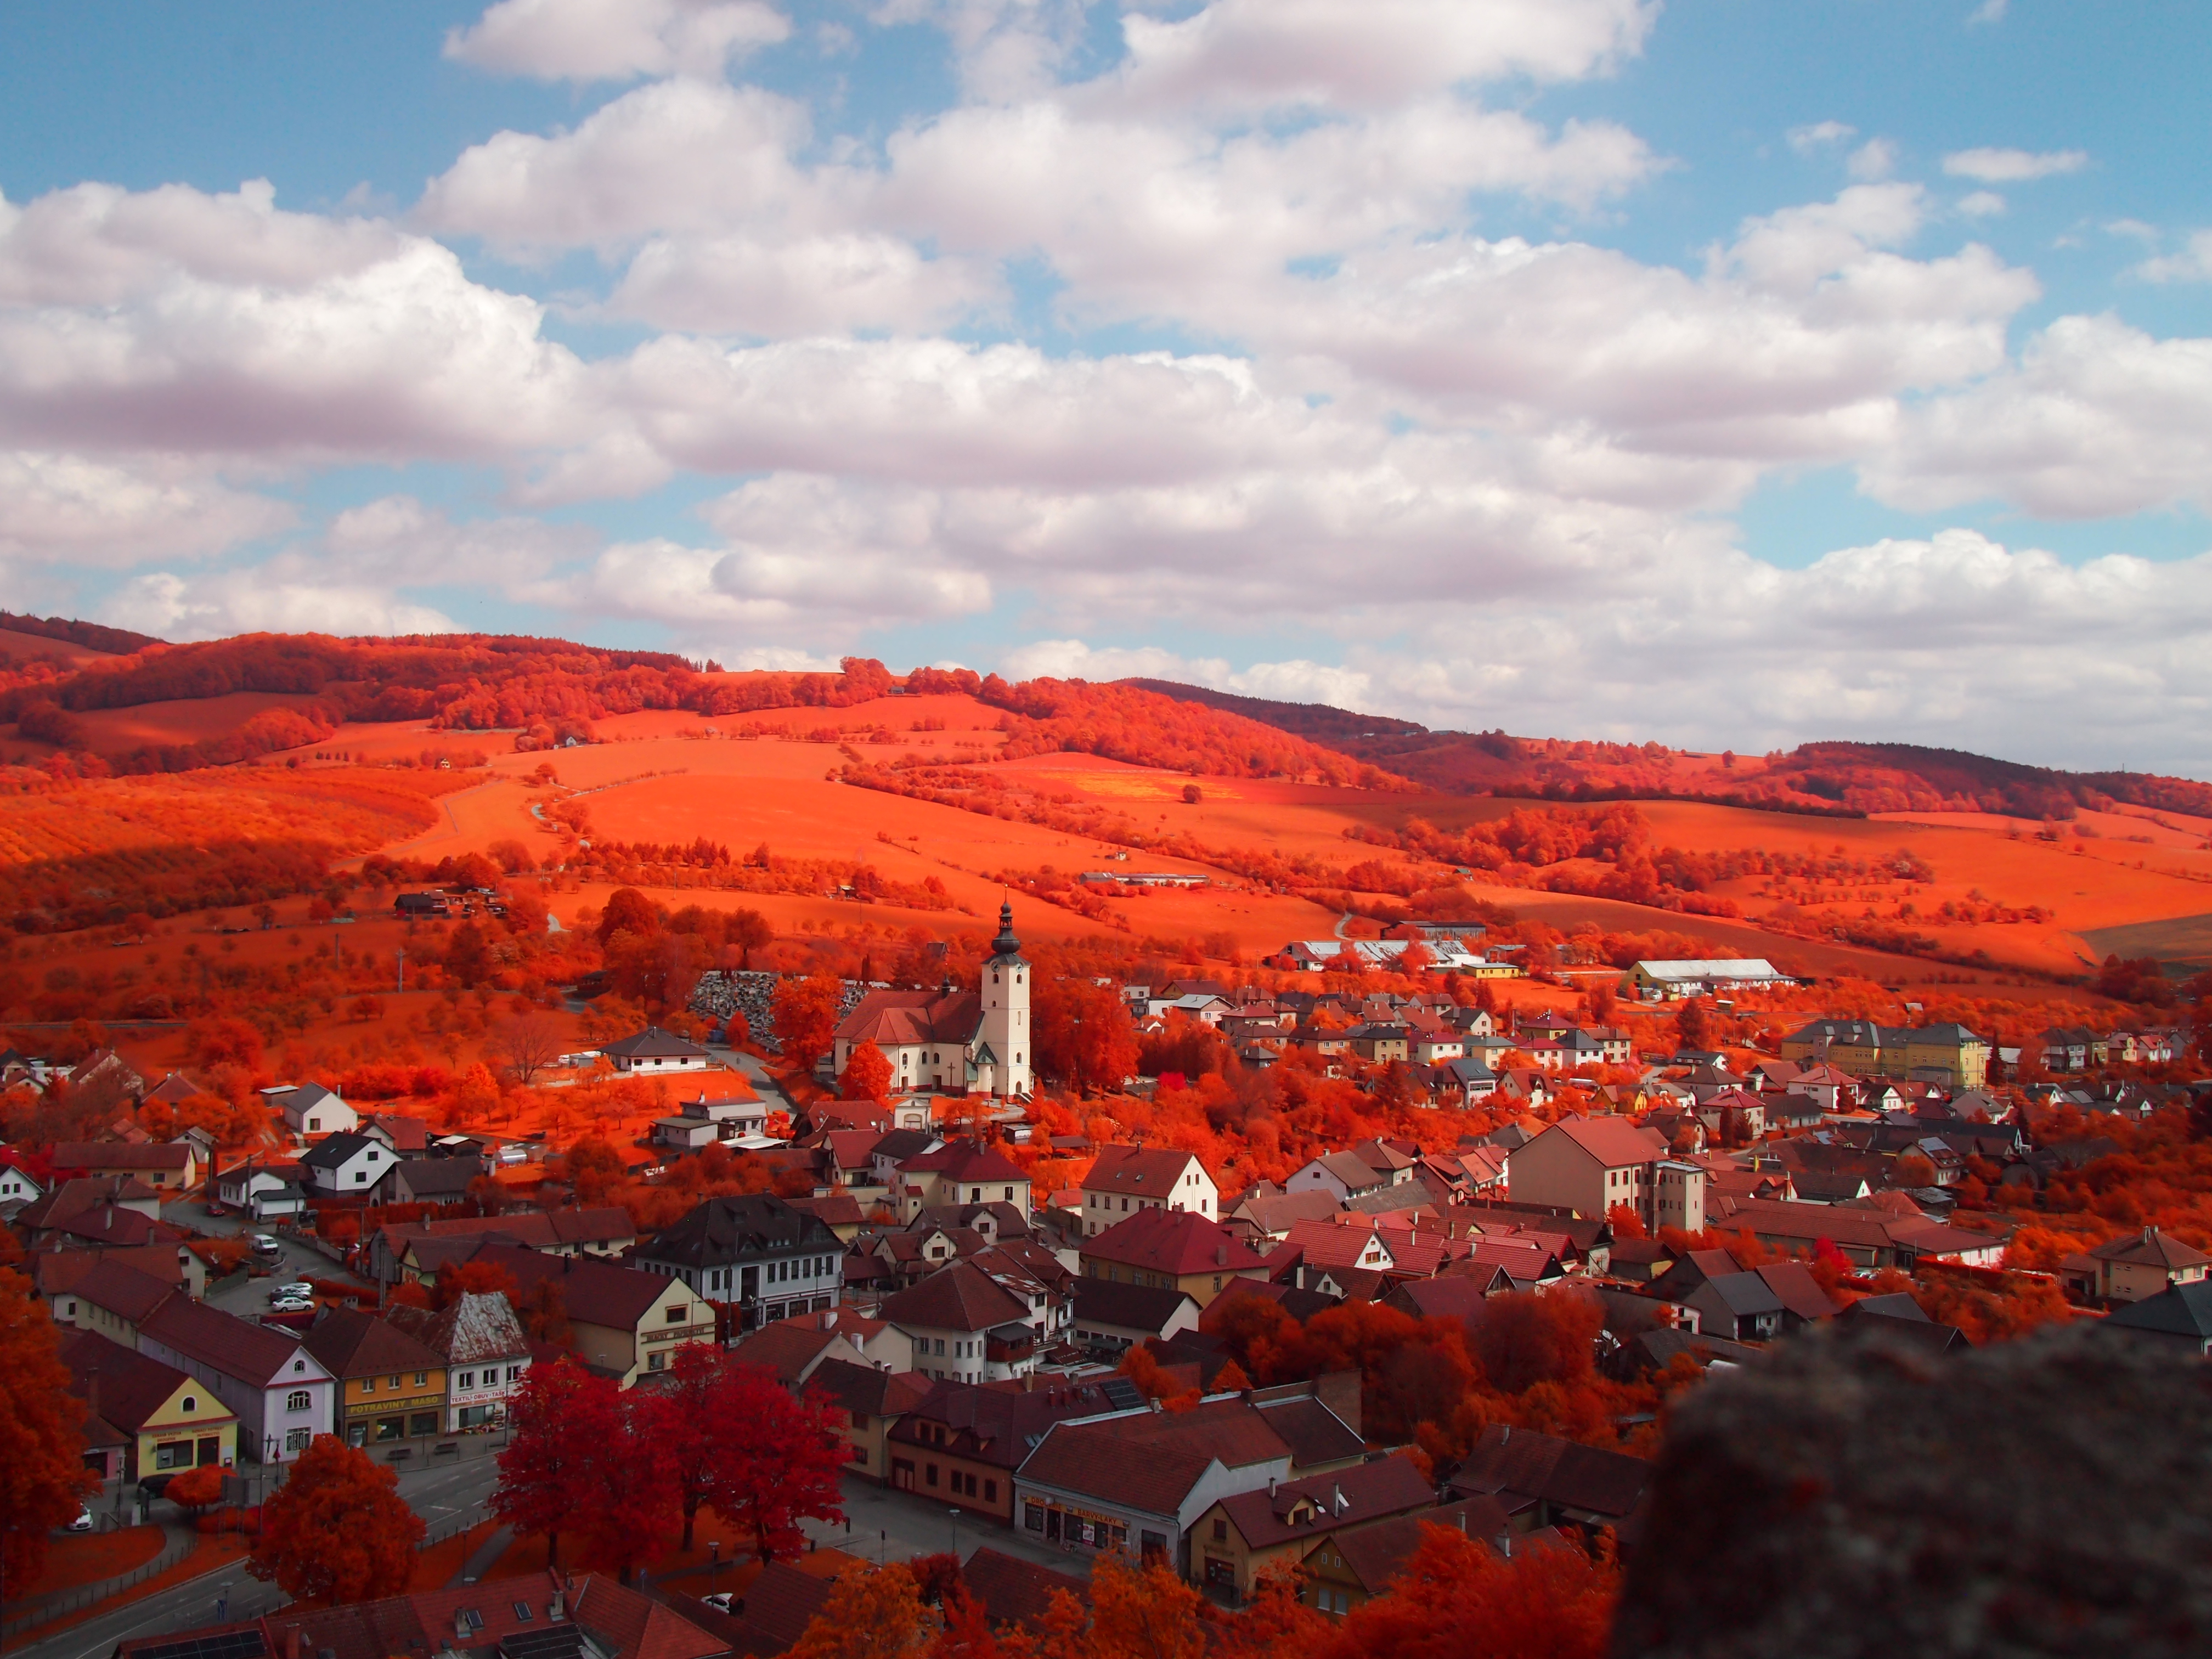
The idea of this setup is:
- The GRB3 hot mirror filters the longer IR wavelengths (above 850nm-ish), while letting in the shorter IR and visible light. This means that that IR light that would trigger all channels (remember that the bayer mask pigments are mostly transparent in infrared) is mostly filtered out, while the "close to red infrared" light, which is predominantly captured by the red channel is still let in.
- The gel filter eliminates red-ish light (600-700nm), meaning our red channel is now capturing a narrow band between where the gel filter's cutoff ends and the hot mirror's cutoff begins.